Food 101: Barbecue Basics and How To Grill
It’s the first official day of Summer, and you can bet your ass there’s gonna be ton of barbecues today! The two go hand in hand, thanks to grilling being a particularly outdoorsy activity. Sure, you can barbecue food during winter, but the comic relief will be off the charts. Beside that, there’s still just something charming about seasonal cuisines, and so leaving the grilled food to summertime just seems right in a sense. Grilled foods, afterall, are one of the healthiest ways to cook. They contain less fat due to it dripping away under the high heat, and don’t need breading or extensive manipulation, meaning they’re easy to prepare gluten-free or for people with other food allergies.
But let’s not get ahead of ourselves. Some people don’t know how to grill. What do you do if you’ve never done it before? Hell, as far as cooking methods go, grilling is potentially one of the more… not ‘dangerous’ ones per se, but rather you do need to know the proper techniques involved in grilling or you can either injure yourself or just totally ruin the food. If you’re an out and out dad and can grill in your sleep, fantastic. This post is here for everyone who’s trying it for the first time, or just wants the knowledge for future reference.
First things first. You need to decide on what you’re gonna be grilling. Odds are, it’s gonna be some type of meat or vegetables. For this post, I’ll be demonstrating chicken, since it’s all we eat. For pork or beef or other meats, your cooking time will be a bit longer, but the basic process will still be mostly the same. Vegetables on the other hand you need to grill on either foil or a special grill tray, since they have a nasty habit of falling between the grills and causing fires below.
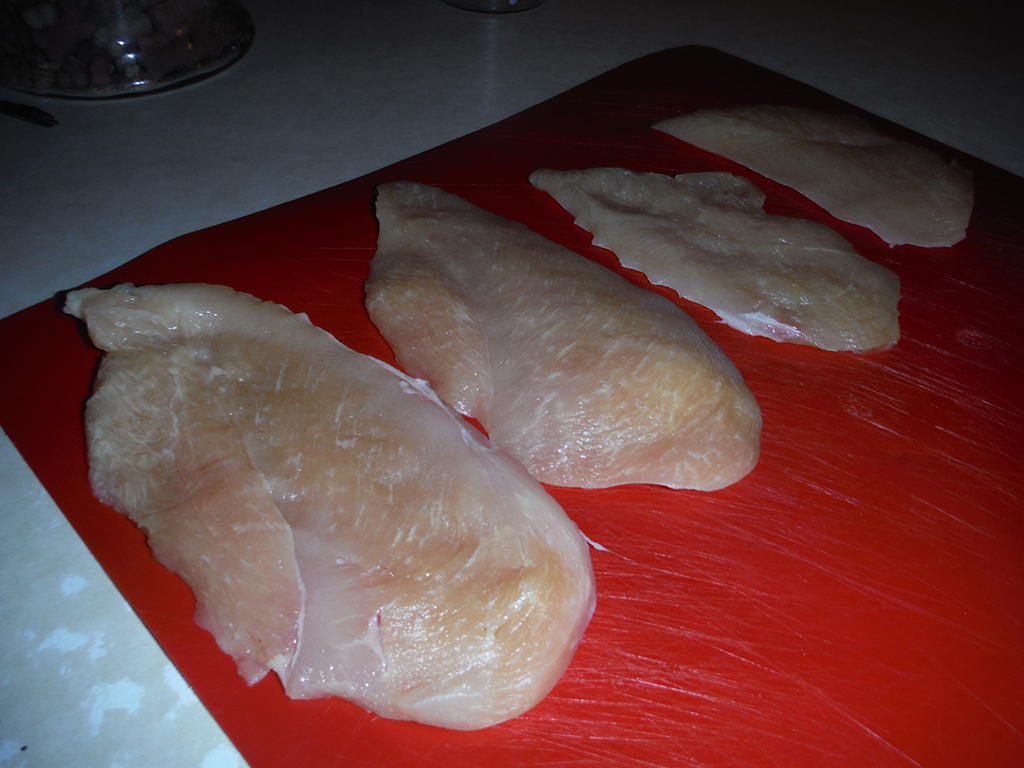
Begin by trimming and cleaning the meat as best as you can. Leaving large amounts of fat on it throws off a ton of grease in grilling, which isn’t ideal for open flames. For boneless skinless chicken breasts specifically, you should pound them with a mallet to tenderize them slightly. Once they’re at around 1/2″ thickness, that’s ideal.

Your next step involves how constructive you’re feeling. If you’d like to make your own dry rub from scratch, now’s the time. Combine it all together in a bowl, and keep it handy. If you’re pressed for time, or simply want to use a premade blend, that’s cool too.
Also at this step, if you’re planning on using barbecue sauce, here is where you either prepare it from scratch, or simply squirt some from the bottle into a bowl. However do note, if you’re using barbecue sauce you still must season your meat. Sauce isn’t always enough to flavor foods since it merely sits on top of it. If you’re grilling with barbecue sauce, you should still lightly season the chicken with salt and pepper, and at least a generic spice blend. Do NOT just coat your meat in sauce here and call it a day. That’s not how grilling works.
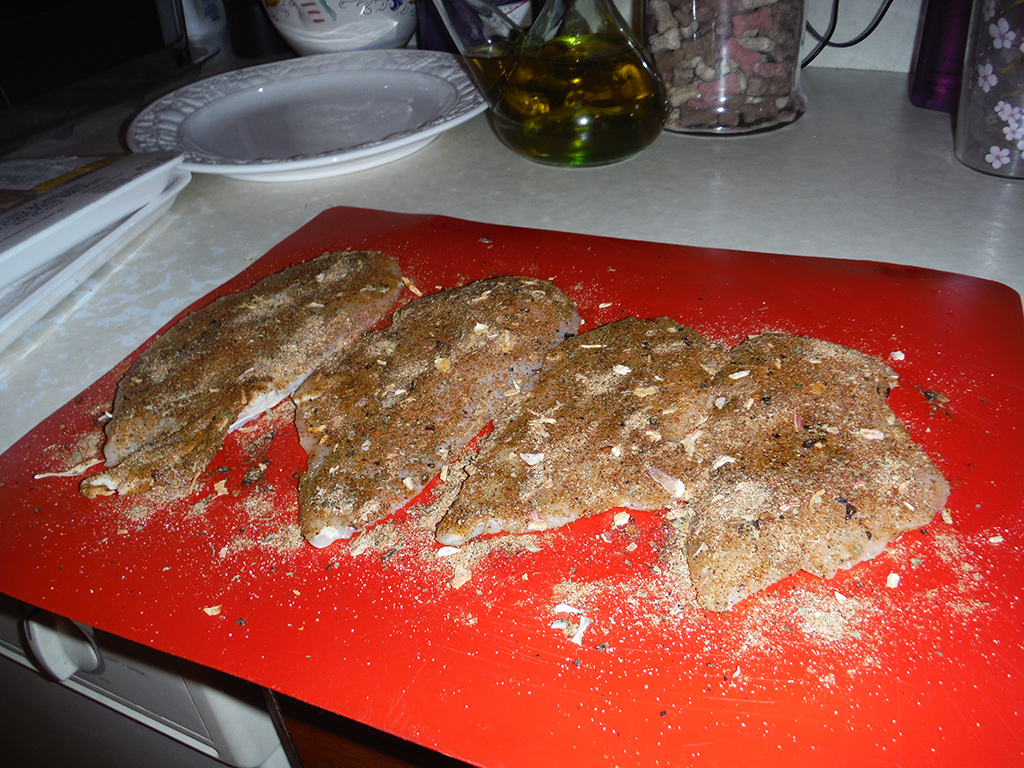
At this point, you’re ready to season your chicken. To do so, lightly coat the chicken with some oil (olive oil works best) and then generously sprinkle your dry rub seasoning on top of that, and then rub it all over and into the chicken. Hence the term ‘dry rub’. Repeat this with the other side of the chicken, and you’re good to go! If you’re using sauce, place it on the side for now. You can’t put it on yet, or else you’ll wipe away the seasoning.
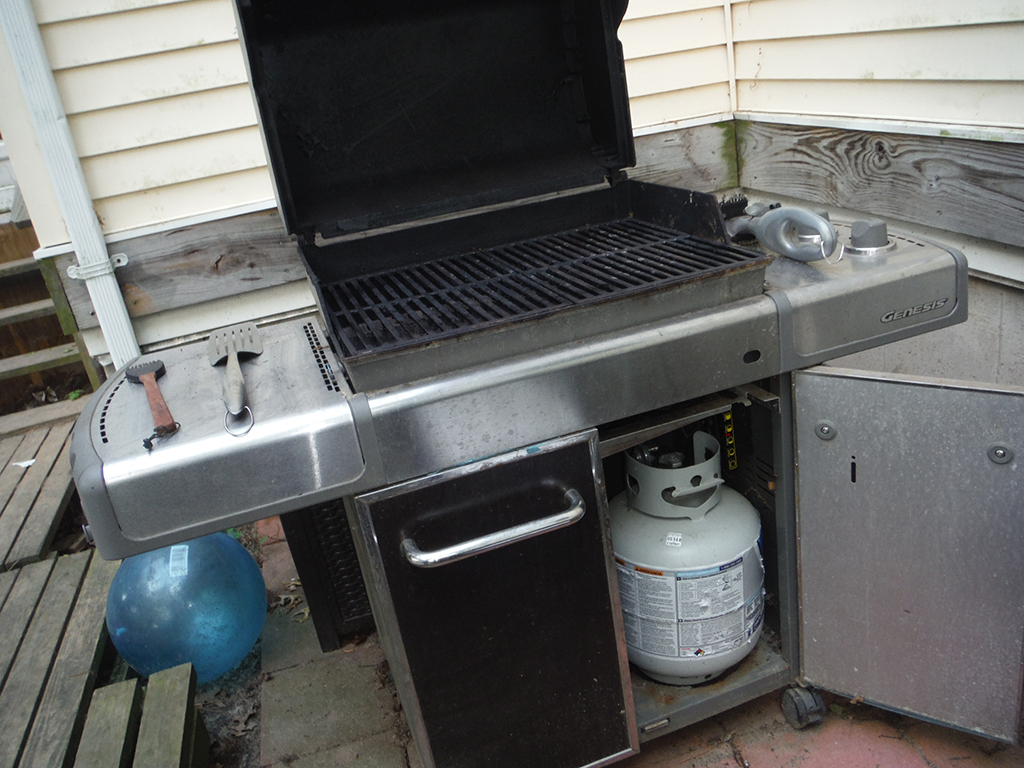
As far as barbecue grill operations go, every manufacturer is different obviously. But despite this, the general procedure is about the same.
- Your first thing to do is locate the gas tank and turn it on. Most propane tanks require you to turn a dial at the top to turn the actual gasflow on. Counter-clockwise will turn it on, and clockwise turns it off. Some people recall the ‘lefty loosey, righty tighty’ mnemonic, so keep that in mind if it helps (just remember, loosening it opens it for gasflow, AKA ‘on’).
- Give it a three or four average turns so that it begins feeding propane to the actual grill itself.
- After this, all that’s left is to turn your grill on and ignite the flame. Again, this depends on your specific model, however most are similar. For this particular barbecue, and many others, you turn the flame/heat knob which is closest to you to the ignition position (usually marked with a flame symbol, or if not, is just the very first marker on the dial).
- After this, most grills have an ignition button you press which simply sparks until the flame finally catches below. Press it, let the flame catch, and then turn the flame control knob to the high or medium position.
NOTE: If your ignition button isn’t working on your grill, or you have a very old model, you may have to ignite by hand. To do this, with the flame/heat knob set to OFF, lift your grill’s actual grill part off, and lower a long match or firestick into the space where the gas and flames actually come out. While holding it there, turn the flame knob to the ignition position and wait. After a couple of seconds, the barbecue should ignite, and you can turn the knob to the regular function positions.

Now that the grill is actually on, you’re ready for your food to actually cook. Using a brush or a towel, spread oil onto your grill while it’s still cool enough to touch. This is essential since most meats will stick to the grill due to its high heat, which creates the worst disaster imaginable. When your grill is oiled and ready, you’re ready to put the meat on.
Place the chicken (or meat of your choice) onto the grill with at least two inches of space in between pieces. Set your flame/heat to medium and close the grill. Let the chicken cook, covered, for 8-10 minutes, or until the bottom has browned and dried slightly. At this point, flip using various tools. For chicken and pork, a fork will do fine. Burgers require a spatula. Vegetables should only be flipped using tongs since they’re more delicate. Monitor your barbecue’s temperature throughout cooking, if it has a thermometer. The temperature should be at least 350º, and no more than 500º.
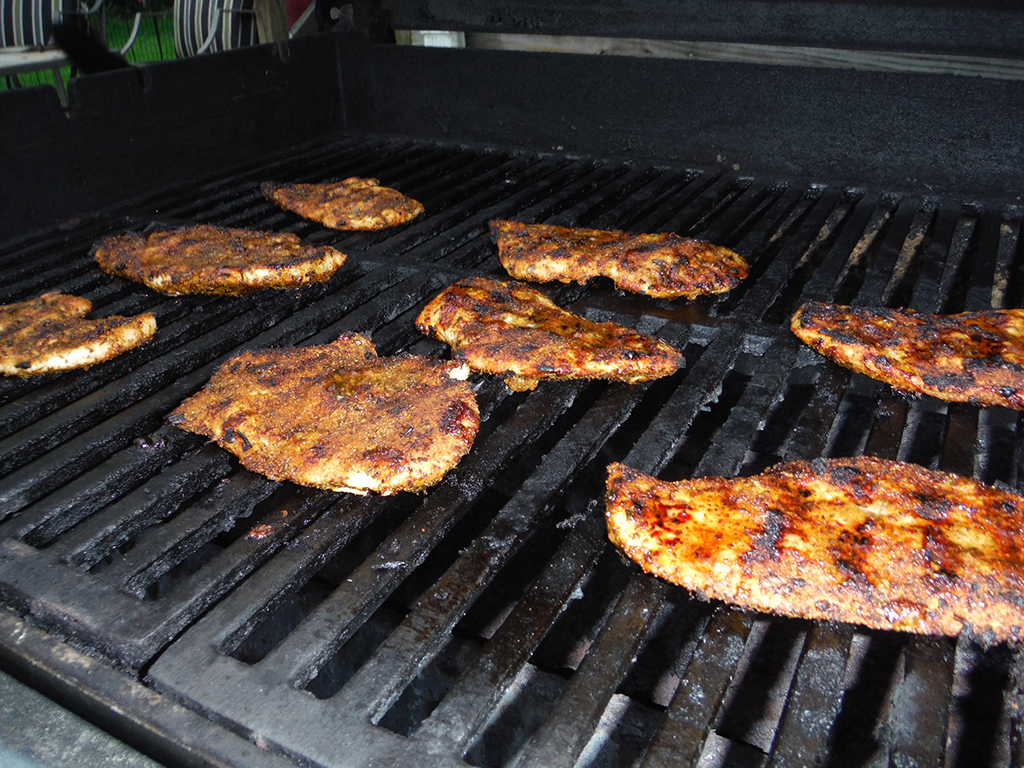
Your barbecue food is almost done! At this point if you’re grilling with a sauce, now is when you finally get to use it! If you’re not, then you get to do nothing for another 10 minutes!
For Sauces:
Generously brush each chicken breast with barbecue sauce. Cover the grill and re-brush every 3-4 minutes, until the bottom of the meat looks dry enough to be flipped again, about 8-10 minutes. After flipping again, brush the dry side with more sauce, cover once more, and lower heat to low. Cook the meat for another 2 minutes. When the meat is thoroughly cooked, or it’s reached an internal temperature of 165º, brush it one last time with sauce, cover and cook on high flame for one more minute.
For Dry Rubs:
Sprinkle any remaining dry rub onto the tops of your chicken. Cover the grill and let cook for another 8-10 minutes, undisturbed. When the meat is thoroughly cooked, or it’s reached an internal temperature of 165º, flip it once again and let cook for one more minute.

There you have it! Grilling seems kind of intimidating at first considering the complexity and nuances of it compared to say, putting food in the oven and walking away for an hour until it’s cooked, but it’s a delicious, rustic cooking method that’s become mainstay everywhere from middle class suburbia to urban street foods. Enjoy it while the Summer lasts! (Unless you live somewhere you can grill year-round, in which case, congratulations you lucky son of a bitch!)
Pro-Tips:
- WARNING: When igniting your barbecue DO NOT turn your flame control knob to the ignition position for a prolonged period of time, before attempting to ignite the flame in the grill. Doing so will create a buildup of propane in the barbecue well, meaning that when you actually do ignite it, you’ll produce a huge flame that will rapidly expand outwards and upward, which can definitely burn you and anyone close to the grill.
- Always remember to turn your barbecue off after cooking. If you forget to turn the gas tank off specifically, it will leak propane indefinitely which will empty it eventually. That sucks for two reasons: it’s not great for the environment, and more importantly it’s a hilarious waste of money since propane isn’t free.
- If you’re grilling burgers and hot dogs, their cooking times are shorter than chicken breasts or pork. Both require an internal temperature of only 145º and generally only need to be cooked about 4-5 minutes on each side. If the juices running from them are clear instead of pink, they’re ready to be cooked.
- As mentioned, veggies are too fragile to be cooked directly on grills. If grilling them, use a special vegetable pan, or even aluminum foil. Vegetables can technically be eaten safely whenever you want, but as far as tasting good, you should grill them until browned around their edges and tender.
Posted on June 21, 2014, in Food 101 and tagged awesome, gluten-free, grilling, healthy, kitchen essentials, knowledge is power, summer. Bookmark the permalink. 2 Comments.


Pingback: Food 101: How To Make Shish Kebab | The Poor Couple's Food Guide
Pingback: Cheat Codes: Save Your Condiment Containers For A Later Date! | The Poor Couple's Food Guide